Friday, November 11, 2011

Convert the Revell Audi Sport Quattro to N-Digital

A while ago I managed to acquire a Revell Audi Sport Quattro rally car at a very good price. I decided that it would be a really interesting challenge to convert a somewhat obscure Revell car to the N-Digital system and tune it for Ninco track just to see it run around my N-Digital circuit, regardless of performance. Also, I could not resist the car's appearance. Visually it seemed to fit my personality perfectly: homely, awkward but you just know that it's going to be fun. And lastly, I'm always looking out for another unique rally car.
 
I read a number of reviews and articles about this car on the Internet and apparently there was a good deal of disappointment that Revell did not produce the car as four wheel drive (4WD). After all, it is a Quattro! So, in conjunction with the N-Digital conversion I decided to also convert the car to 4WD. As if I had any idea of what I might be doing. 

Below is everything required for the N-Digital/4WD conversion.

Anyway, Ninco users will be happy to know that the N-Digital conversion itself was relatively straight forward, primarily because there is plenty of internal space for the decoder chip, and other stuff, in spite of the fact that this is a very small car. My usual steps for a simple N-Digital conversion were performed:
 
- Removed the magnet.

- Lubricated the guide post, front and rear axle bushings, motor bushings and gears.

- Loosened the body mounting screws about one full turn to allow ample body float which really helps with this car's high center-of-gravity. 
 
- Installed the Hobby Slot Racing (HSR) suspension guide with Ninco ProRace braids.
 
- Installed a N-Digital decoder chip that is set up for quick swapping.

The photo below shows the HSR guide with Ninco ProRace braids in place. This has become my "go-to" tuning trick for other than Ninco cars running without magnet on Ninco/N-Digital track that have a guide post holder that is too narrow for the Ninco guides. As an off-road car it also seems appropriate to replace the "fixed" stock guide with one that is able provide at least some semblance of "drop arm" effect.

I did not bother to test the car extensively in 2WD but went straight to the 4WD conversion. My goal here was to make the car 4WD so that I could include it in an existing N-Digital race class comprised primarily of Ninco WRC 4WD rally cars. This meant pulleys and a drive belt (rubber band actually). Also, I did not want to add any cost to the car so I would try to use parts that I already had on hand. The more capable among us would undoubtedly replace the stock plastic wheels with machined aluminum set screw wheels as well as the gears, axles and bushings. And this car would definitely benefit, but I wanted to keep the original wheels' appearance and I do not have the means or inclination to create inserts from the stock wheels.

I happened to have on hand two spare 4WD pulleys from the PowerSlot Hummer H1. These are made for a 2.5 mm axle but it really doesn't matter because the long hubs of the Quattro's wheels leave no room to put a pulley on the axle outside of the bushing, where it needs to be (see photo below).

So, the solution was to [hand] drill the pulley's center hole to a size that allows it to fit snugly over the wheel hub. Then it was glued in place. This also required trimming a small amount of material from the ends of the four flanges on the hub. The result, shown below, is a perfectly positioned pulley outside the bushing on the hub. I have to mention that I tried every technique that I know of to get these wheels off the axles but they would just not budge. It became obvious that if I kept trying they were going to break. And if the wheel can't be removed then it's impossible to install the pulley. The solution to this dilemma was to use a sharp blade hobby knife to cut the pulley in one radius from the outside edge to the center hole. This allowed the pulley to be twisted apart just enough to slip it over the axle and then onto the wheel hub. The cut was then closed using CA glue to restore the pulley to its original integrity.
The following two photos show both the top and bottom views of the chassis with the pulleys and rubber band in place. The only potential interference with the travel of the rubber band was presented by a small post on the chassis that can be seen at the top edge of the N-Digital chip in the upper photo. Trimming a very small amount of material from the outside of the post solved the problem with no effect on the chassis' structural integrity.
The photo below shows the result of the entire process. The chip is cradled securely between the horizontal chassis braces and there is no interference between body and chassis. The 4WD assembly runs freely and the pulleys are surprisingly true with no obvious wobble. Note that about 10 grams of weight (in the form of magnetic refrigerator tape) was added to the deck in front of the guide and just behind the front axle.
Once on the track I was surprised at how well the car ran. It's not going to win any major rally competitions, and it really can't keep up with the Ninco rally cars that I have, but it competently handled the slings and arrows of my bumpy, twisty N-Digital track that it otherwise could not tolerate out-of-the-box. And most important to me, I can say that I have a 4WD Revell Quattro that actually runs N-Digital!

As I said previously, I did not test the car in 2WD mode. I ran the car periodically for a few months and just had silly fun with it. After the car sat for a while, the rubber band eventually dried out and broke. So I ran it in 2WD mode because I was too lazy to find another rubber band of the correct size and cross section profile. While running in 2WD mode I just had the feeling that the car was not handling as well as it did before. So, I installed another rubber band reestablishing 4WD mode and the lap times were reduced by about two tenths of a second on average. At least on my track, the 4WD set up yields better performance. Of course it could also be my driving...
 
In summary:

The Revell Audi Sport Quattro was converted to N-Digital and 4WD.

Apart from the cost of two spare PowerSlot Hummer 4WD pulleys, there was no additional expense. Incidentally, the PowerSlot pulleys are dimensionally very close the to pulleys from Ninco -- in the Ninco #80206 4WD kit -- so the parts required for this conversion are generally available.
 
If you really wanted this car to be a "break neck" competitive rally car, I believe that replacing the wheels and running gear with race grade components would be necessary. I converted the car to N-Digital and 4WD without regard to what performance might be because I felt that it would be fun to do (without getting myself into too much trouble) and it would yield a car that would be amusing, if not fun to drive. From my standpoint, I was right on both counts. If you are an N-Digital user and a chance comes along to get one of these cars, don't hesitate.
 
by Michael Ashton

Thursday, November 10, 2011

NINCO News October 2011

*** Estimated Availability is December 2011 ***
NINCO MCLAREN F1 GTR ITALJET 1/32 Slot Car #50595
The most popular NINCO slot car of the 90’s is back. An immortal model now enhanced with the powerful NC-14 motor to offer incredible race track performance.

NINCO PORSCHE 356 TESTIROSA 1/32 Slot Car #50594
A Classic from the NINCO catalog, traditional in-line mechanics for this type of model, now with an NC-14 long can motor and 20x7 tires.

NINCO FORD MUSTANG DHL 1/32 Slot Car #55044
All American FR500 Mustang with the usual NINCO1 mechanics, ideal for home race set use and for younger drivers.

NINCO AUTOBAHN RACERS Race Set #20156
Lots of NINCO’s patented slot car track with setup choices specially designed for the longest layouts in the minimum available space.
  • Includes the latest MERCEDES SLS GT3 + AUDI R8 GT3 1/32 slot cars.
  • With NEW Power Track (10118) and New 35Ω Controllers using RJ type connectors.
  • 7’ 11” of track; three different large layouts possible.
  • Standard layout shown is: 8.07’ x 4.4’; plus, choose 9.41’ x 4.4’; and 10.66’ x 5.64’.
Like all NINCO track, it can be easily converted to N-Digital racing.

NINCO NEW RJ Standard Power Base #10118
New connecting straight (Power Track) with “RJ” sockets for new 35Ω Controllers.

NINCO RJ 35 Controller #10315
New 35Ω Controller for the more experienced racer; with new design... and RJ type connector. Ideal for 1/32 Sport and similar slot cars.


NINCO XLOT XL2 MOTOR #61602
Additional XLOT performance option for:
  • More Acceleration
  • More Speed
  • Faster track times
  • 28,000 RPM – 400mA – 330 gm/cm

NINCO NC-13 EVO Motor #80613
Upgrade your NINCO1 cars with:
  • More RPM
  • Higher Top Speed
  • More aggressive performance
  • 20,000 RPM – 155mA – 155 gm/cm

Monday, October 3, 2011

Converting the Spirit Peugeot 406 Silhouette to N-Digital

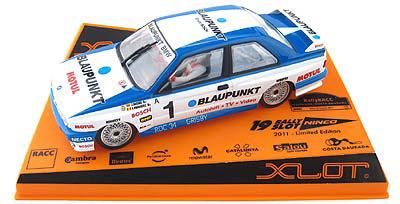
I recently received a Spirit Peugeot 406 Silhouette for my birthday. I like the appearance of the car very much and have seen several favorable reviews of the car at various forum sites. However, I had no idea how the car would perform when converted to N-Digital on the Ninco track.
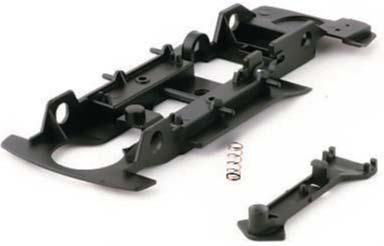
Upon removing the body from the chassis it's obvious that the car is relatively high-quality. It comes standard with adjustable vertical travel for the front axle, an adjustable separate motor/drive train pod and a motor rated at 23,000 RPM @ 14.8 Volts.

The N-Digital conversion was very easy, primarily because there is ample internal space for the decoder chip. I performed the usual operations for a simple N-Digital conversion:

- Removed the magnet.

- Lubricated the guide post, front axle holders, rear axle bushings, motor bushings and gears.

- Set the pod up loose, which always seems to help on Ninco track.

- Adjusted front axle travel to about 50%. Again, some travel is needed due to the uneven nature of Ninco track.

- Installed Ninco ProRace braids.

- Installed a N-Digital decoder chip that is set up for quick swapping.

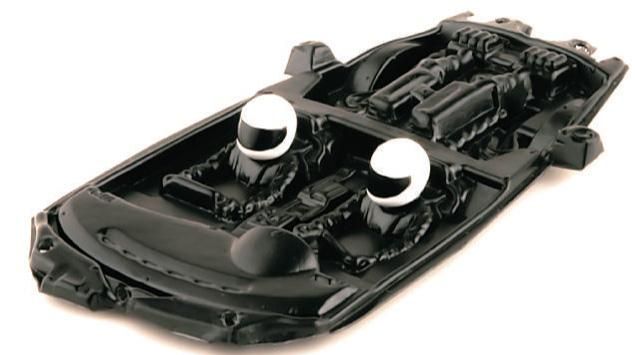
The following photo shows the relative simplicity of the installation and how neat and tidy everything is.
Also worth noting is the fact that the geometry of the stock Spirit guide flag turns out to be ideal for excellent performance on the N-Digital/Ninco track.
So, with nothing more than the braid change and virtually no tuning to speak of, the Sprit Peugeot 406 turns out to be an outstanding performer on my very technical 60' N-Digital track. The motor is smooth with plenty of power. The car stays in the slot and handles corners as well as any car that I have. It is slightly faster than my best Ninco GT cars and is just a lot of fun to drive.

Well, if this conversion was so ho hum then why write home about it? Two reasons actually:

1.) The car turns out to be a great N-Digital performer, so I want to recommend it to N-Digital users;

2.) There is an issue -- related to the car's superior performance -- that N-Digital/Ninco users should be aware of.

It seems that the superior performance of this car, especially on Ninco track, may come a little bit on the sly. There are several characteristics of the chassis that become apparent very quickly:

- The motor has a relatively strong magnetic downforce. Even without the chassis magnet you can feel the pull when picking the car up off the track;

- The chassis rides very low on the track leaving little clearance. This is the result of a combination of chassis design and some very low-profile stock tires;

- The bottom of the motor case actually protrudes about 1/2 mm below the bottom surface of the pod. This accentuates the magnetic downforce and can possibly bring the motor case uncomfortably close to the rails.

The following three photos show rear and side views of ground clearance with the Spirit stock tires and the protrusion of the motor case through the pod opening.
Even with the magnet removed the feel of the car when driving is that of a magnet-equipped car. It's not stuck down like extreme magnet racing, but you can perceive the advantage when taking the corners. The back end will come out without "snapping" but you have to pay attention and be careful. There is no denying that the car is benefiting from the "enhanced" downforce. Regardless, the car is still a lot of fun to drive.

I did not experience any problems with the low chassis clearance on my track but you should be aware of how close to the rails the motor case is able to come. If this were to become a problem, especially on an N-Digital track, care must be taken to insure that the motor case cannot touch the rails under any circumstances. Damage to the N-Digital decoder chip could result if a short circuit were created by motor/rail contact.

One solution would be to cover the bottom of the motor case with electrical tape. In fact, this would be a good test to determine if the motor is touching the rails anywhere on your course. If there is no sign of scuffing or fraying of the tape then it could be removed or left in place as a safeguard.

If the motor is bottoming out as evidenced by damage to the electrical tape, a more effective solution would be installation of rear tires with a higher profile. The first photo below shows the car with Ninco 19 x 10 slicks in the rear. The difference is visually imperceptible, however, it did raise the chassis very slightly -- evidenced by a very small increase in lap times, which could also be related to tire grip. I can't be 100% sure.
The second photo below shows Slot.it 19 x 10 slicks on the rear. This tire has a much higher profile and the increased clearance is clearly evident. Note that the increased sidewall height required the use of a spacer (#6 nylon washer) under the rear body mounting post to avoid tire contact with the wheel well opening. This also had the effect of increasing lap times by about two to three tenths of a second, undoubtedly due to decreased magnetic force but I think also because of the tire compound. I think these are S2 (not great for Ninco track) but again, I'm not sure. The Slot.it P5 compound works quite well on Ninco track. In any event, it made the Peugeot's performance match up perfectly with the Ninco GT's on my track.
In summary:

There were no physical modifications required by this conversion. All stock parts are in tact, allowing the car to be returned to absolute stock condition at any time.

The car has a relatively low chassis clearance which can be a problem on Ninco track, but this is easily dealt with if necessary.

In my environment this car is a truly superior performer. If the prospect of increased magnetic downforce providing a performance advantage does not appeal to some N-Digital users, it is relatively easy and inexpensive to eliminate that advantage. The car will still handle quite well and will probably fit perfectly into existing GT race classes. So don't avoid this car because of that. Especially since these Spirit 1/32 slot cars are currently available from several slot retailers at a very attractive price. This is a great addition for any N-Digital user who likes this class of racing. Most importantly, it is really fun to drive.

by Michael Ashton

Thursday, September 8, 2011

AMT Slot Car Kits

AMT 1970 Chevy Camaro Z28 1/25 Slot Car Kit

AMT 1957 Chevy Bel Air 1/25 Slot Car Kit

*** Estimated Availability is December 2011 ***

Wednesday, September 7, 2011

A Simple, Inexpensive Pit Wall for NINCO N-Digital

As an N-Digital user I like the Pit Lane Kit. It's not as sophisticated as some of the other brands, however, its simplicity and reliability fits well into my racing requirements. The only real complaint that I have is the lack of separation between the pit lane and the outside lane of the adjoining track. Now, if you have single lane curve track sections or the skill to fabricate custom track pieces that are compatible with the Ninco track system, then you could physically separate the pit lane from the rest of the track. In my case, even if I could do that, it wouldn't matter because I don't have the required space.
So, here is a simple and inexpensive alternative. A pit lane wall made from three simple components:

1. A vinyl door sweep available from Walmart for about $2.50
2. Nylon screen material available at most hardware stores. You need about $0.75 worth.
3. A full page (8 1/2" x 11") adhesive label to print advertisements on an ink jet printer (optional).

The photo below shows the screen material and door sweep. The screen material will be used to simulate chain link style fencing on the top of the pit wall. The door sweep has a clear panel that runs along the top and a shallow clear lip that runs along the bottom. In the middle is a fairly rigid white plastic panel. On the back of the rigid panel is a strip of very sticky adhesive normally used to attach the sweep to the bottom of a door. This adhesive will be used to hold the screen material in place.

Step 1: Cut a strip of screen material to a length just a little longer than the required length of the wall, which will be exactly 31 3/8" (my pit lane has been extended with one full straight section). The height of the strip should be slightly higher than the height of the door sweep.

Step 2: Removing the adhesive backing as you progress, press the screen material into the adhesive so that the top and bottom of the screen strip are just beyond the the top and bottom of the door sweep. Keep the screen material stretched tight as you progress (see photo below).

Step 3: Trim the screen with a utility/hobby knife at the top edge of the door sweep clear strip and at the bottom edge of the adhesive strip. Note that this is the back of the wall which normally will not be in view. If necessary, the screen material on top of the adhesive can be hidden by a strip of white/masking tape (see photo below).
The next photo below shows the result when the door sweep (now pit wall) is flipped over showing the front view.
The last three photos below show the finished wall in place.
The advertisements on the wall were ink jet printed on a full 8 1/2" x 11" adhesive label sheet and scored individually with a hobby knife, allowing them to be peeled and stuck.

As noted above, the bottom of the door sweep has a shallow clear lip. The combination of this flexible clear lip and the rigid thin white door sweep panel fits perfectly (and securely) in the junction between the single lane and regular straight track pieces that comprise the straight section of the pit lane. No glue or track modification is necessary.

I think that, in spite of its low cost and simplicity, the pit wall improves the appearance of the N-Digital Pit Lane significantly. And there are probably many other applications for this type of easy-to-create barrier.

by Michael Ashton

Tuesday, August 16, 2011

Polar Lights Slot Car Kits

Polar Lights 1966 TV Batmobile 1/32 Slot Car Kit

Polar Lights Green Hornet Black Beauty 1/32 Slot Car Kit

*** Estimated Availability is December 2011 ***

AMT Slot Car Classics

AMT 2006 Chevy Camaro Concept 1/25 Slot Car Kit

AMT 1966 Chevy Nova 1/25 Slot Car Kit

*** Estimated Availability is December 2011 ***

Saturday, August 6, 2011

NINCO News September 2011

*** Estimated Availability is October 2011 ***
NINCO #50558 AUDI R8 GT3 APT LIGHTNING
The latest slot car of choice of the NINCO GT category with ProRace set up including: new red motor pod, lexan interior, NC-12 motor, transparent silicone cables, ProRace V.03 15” front wheels with ultra low profile tires, ProRace V.03 17” rear wheels with 20x10 tires, ProRace 3/32" axles, ProRace bushings and ProRace axle stoppers. Gear set: 31T crown and 13T pinion.

NINCO #50533 FORD GT MEDLEY LIGHTNING
Well known for its success, the FORD GT comes in yet another guise. LIGHTNING version with ProRace set up including: new red motor pod, lexan interior, NC-12 motor, transparent silicone cables, ProRace V.03 15” front wheels with ultra low profile tires, ProRace V.03 17” rear wheels with 20x10 tires, ProRace 3/32" axles, ProRace bushings and ProRace axle stoppers. Gear set: 31T crown and 13T pinion.

NINCO #50589 PORSCHE 997 FIRST LIGHTNING
Lightning version with 3/32” ProRace material fitted as standard. Ready to race out of the box: lNC-12 motor, transparent silicone cables, ProRace V.03 16” wheels with 20x10 tires, ProRace 3/32" axles, ProRace bushings, ProRace axle stopper and ProRace body screws. 32T crown/13T pinion gear set.

NINCO #50590 AUSTIN HEALEY LM CLASSIC
Another Classic from the NINCO catalog reproduced to the highest level of detail to meet the requirements of the demanding slot car collector. 

NINCO 1 #55025 MEGANE TROPHY KINESPORT
Attractive livery of this popular model. Usual NINCO 1 slot car set up, ideal for the home track. Motor NC-11. 

NINCO 1 #55036 MEGANE TROPHY KINESPORT N-DIGITAL
NINCO 1 digital version with installed N-Digital decoder chip as standard for NINCO N-DIGITAL slot car racing.

NINCO 1 #55042 LAMBORGHINI DIABLO VALVOLINE
New livery of the Lamborghini Diablo, usual NINCO 1 slot car set up, ideal for the home track. Motor NC-11. 

NINCO 1 #55043 LAMBORGHINI DIABLO VALVOLINE N-DIGITAL
NINCO 1 digital version with installed N-Digital decoder chip as standard for NINCO N-DIGITAL slot car racing.

NINCO #80433 3/32" BALL BEARINGS (2)
New competition spec ball bearings. Reduced axle wear. 
Tip: placing 2 of these bearings instead of 1 double bearing - uses less space, shock absorbtion is spread more equally and less pressure is placed on the chassis.

NINCO XLOT #60019 BMW M3 E30 RALLY RACC COSTA DAURADA 2011- FLEX
For the first time since 1994 when NINCO began the RACC Costa Brava/Daurada, commemorative collection, the chosen slot car will be an XLOT and therefore 1/28 scale. This replica, reproduces a classic of Spanish rally history, with driver; Pep Bassas. This limited Edition is a must for collectors.

The model is an XLOT FLEX with the new plastic chassis, allowing key mechanical adjustments: adjustable motor position and drop arm guide adjustability. As with the rest of the FLEX models, the bodyshell is adaptable like the more complex metal XLOT chassis.

NINCO XLOT #61807 CHASSIS WEIGHTS FLEX
Lowers the center of gravity on an XLOT FLEX 1/28 slot car.

NINCO XLOT #61808 CHASSIS BMW FLEX
Replacement FLEX plastic chassis for the XLOT BMW M3 1/28 slot car.

NINCO XLOT #61408 STAINLESS STEEL 53.0 mm WIDE AXLES (2)
Replacement axles for the XLOT BMW M3 1/28 slot car.

NINCO XLOT #61805 BMW M3 BODY KIT
Each XLOT body kit comes with an unassembled, plain white body shell, ultra lightweight molded cockpit and all the other parts needed to complete a body. A slot car racer can personalize the body with the paint scheme of their choice!

NINCO XLOT #61815 BMW M3 LEXAN INTERIOR TRAY
The NINCO XLOT BMW M3 lexan interior tray is lightweight and is used to lower the center of gravity of the 1/28 slot car.