Tuesday, January 15, 2019

Going to Rehab


Well, probably not the kind of rehab that you’re thinking of. In this case a slot car is being rehabilitated.

In the 1950’s and 60’s companies such as Strombecker, Eldon, Marx, Cox and others were manufacturing high quality slot cars for the home enthusiast. These cars were, for the most part, well detailed and the bodies were scale accurate. Their chassis were often made from brass or aluminum and although considered primitive by today’s standard, were truly state of the art for mass-produced, ready-to-run slot cars at the time.

We know that they were high quality because many of them are still around and running on slot car tracks today. And, if in pristine condition and good running order, they can be considered collectible.

Naturally the pristine examples are relatively rare. The majority tend to show the effects of decades of hard racing and/or storage in less than ideal conditions. In most cases the chassis is damaged or just worn out, and replacement parts are virtually non existent. And the body may be missing parts such as the windshield, driver’s head or mirrors. But if the body shell is in reasonably good shape, without breaks, cracks or major deformity, then it is a prime candidate for “rehabilitation”. This involves refinishing, or at least cleaning up the body and building or obtaining a new, more modern chassis.

While perusing the major auction site one day, I was lucky enough to win a Strombecker Ferrari Dino 206 S (pictured below) for a very reasonable price. 


The body was in excellent condition with only a small piece missing from the top of the windshield and some discoloration under the number rondel sticker. The overall surface was good with only minor scratches.


The chassis is typical of Strombecker cars that were included in a boxed racing set. Its condition was among the best I have seen in a home market car from this era. I feel that it probably put this car in the collectable category. However, because my goal was to modernize and not restore, I had no use for the chassis. In fact, I was able to sell the chassis for about the same price that I paid for the entire car.


The rehabilitated Dino 206 S is pictured below.


The body was molded in the typical Ferrari red color. I did not paint the body because the original finish looked quite realistic to me. Scratches and mold release lines were wet-sanded out with 600 grit sandpaper. The entire body was then sanded with a 3000 grit automotive finishing pad. This was followed by a complete rubdown with automotive plastic polish, which was also applied to the windshield.

The driver, interior, wheels, inserts and tail lights were the only items that were painted. The tail lights were re-chromed and then painted with translucent acrylic stoplight red paint.

Decals are for an early 1970’s Ferrari Formula 1 car and were provided by Indycals Decals.

The windshield wiper, roll bar and rear view mirror were scratch built from styrene stock and scrap. The rear grills were fashioned from wire mesh coffee filter screen brushed with acrylic silver paint.

The finished body and windshield were clear coated with Future floor polish.


The chosen chassis is a PCS 32. This is an inexpensive, basic, adjustable wheelbase chassis that has a simple straightforward set up yet performs very well.


Chassis components:

• Motor: BWNC1
• Crown gear: Slot.it 27z
• Pinion: Ninco 9z
• Bushings: Slot.it brass
• Axles: Ninco 3/32
• Guide: ScaleAuto
• Wheels/inserts: BWA
• Tires: Ninco Classics for the A/C Cobra


The PCS 32 chassis is ideal for the typical Strombecker body because the original mounting posts are adaptable to the chassis. Mounting post inserts were fabricated by gluing (plastic epoxy) 1/8” styrene tubing inside 3/16” styrene tubing. The combination tubing is then cut to the approximate length and glued inside the existing mounting posts and sanded down to achieve proper stance and ride height. A hole is then drilled in each of the chassis side boards to accommodate the screws that secure the two rear mounting posts.


§              §              §              §              §


The rehabilitated Dino runs very well and will undoubtedly fit nicely, based on looks and performance, into a racing class such as the Ninco Classics.

I think that it’s great that a 55 plus year old slot car can get a new lease on life and be running around a slot car track, where it belongs, once again. So if this kind of project appeals to you, keep an eye on the Internet auction sites for one of these cars. In many cases the body may be offered alone so that you don’t have to buy a chassis that you really don’t want. Let’s get these beautiful slot cars back on the track — they deserve to be there.

_Michael Ashton

Thursday, November 1, 2018

Scalextric Stock Car Challenge Review

I have to give Scalextric credit for investing heavily and bringing us plenty of American slot car products.  This Scalextric Stock Car Challenge race set is no exception, with two 1986 Chevrolet Monte Carlos that are available for the first time as a 1:32 scale slot car.  The included cars are exclusive to the set which are fantasy liveries but still look the part.

Scalextric Stock Car Challenge race set box
The race set came well packed in a really nice box that has a lot of good information including all the features of the race set.  Opening the box, the track is bundled together with rubber bands and the ends protected with cardboard.  Each car is held in place securely from the bottom of the chassis with a screw-in fastener.  The instructions and warranty information come in a clear bag.  Overall, I'm very impressed with the packaging which is always part of the fun of getting a new race set.

Scalextric Stock Car Challenge contents
Now it's time to get into setting up the track.  Some considerations are that Scalextric track is made of a somewhat soft plastic, so it's best supported on a hard surface such as a hard wood floor or a table top.  If going the table route, be sure that you have some sort of barrier system in place since 1:32 scale slot cars tend to have a lot of detail and aren't really made for flying off the table to the ground excursions.

The Scalextric track is really easy to put together.  You just slide it together and the tabs on each end locks it in place.  To disassemble, you only need to push the tabs on each end in and gently slide the track apart.  I chose to start off with the layout on the front of the box which takes up a space of 7' 4" x 4' 4" with a total running length of 18 feet.   The instructions also include 3 alternate oval layouts that can be built using the included track.  The set comes with banking supports that bank the curves 10 degrees for even more realism.
Scalextric Stock Car Challenge layout
Now that the track is assembled, it's time to hook up the AC/DC transformer and the controllers to the power base.  The plugs are made in such a way that you can only plug the transformer plug in the center of the power base and the controller plugs will only fit the controller inputs on the power base.   Traditionally, Scalextric race sets came with an AC output transformer that was converted to DC by using electronics inside the power base.  Well, Scalextric has simplified things by going to a 15 volt DC output transformer that is rated at 1.2 amps, which is more power than the 0.8 amp transformer used in previous Scalextric sets. This extra power helps to eliminate any power surges on the track which ultimately leads to better racing.

Scalextric 1986 Chevrolet Monte Carlo 1:32 slot cars
The wait is almost over, just take a quick look at the cars and it's time to start racing.  Scalextric did a really nice job with these Monte Carlo stock cars. They are advertised as Super Resistant so the cars should hold up well and are also Digital Plug Ready, which means these cars can be easily converted to the Scalextric ARC Pro digital system at some point.  A quick spin of the wheel  found them to be very true on both cars which is a good sign for consistent handling.  Time to put each car on the track.

Scalextric hand controller with 4 speed settings
The set comes with all new Scalextric hand controllers that are very comfortable to hold and have 4 speed settings: 25%, 50%, 75% and 100% of the available power.  Just to get a feel for the track, I started at 25% and found the car very easy to drive with the ability to almost go wide open around the entire track.  This is a great option for young kids and those with little to no slot car racing experience.  I tried the different hand controller speed settings and found the 75% setting to be ideal for this oval track.  On a larger track the 100% speed setting might be the way to go for the more experienced slot car enthusiast.

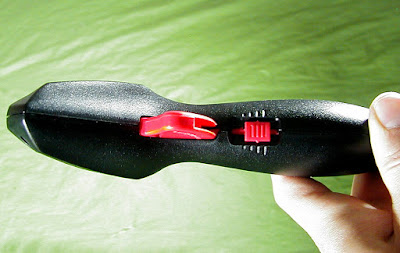
I did come across a problem when trying the second car as it would just stutter and barely move at times.  I then tried the second car with the the controller that I used with the first car and it ran fine.  This led me to believe something was wrong with the second controller so I decided to open it up by removing two screws.  After opening the controller, I found the problem right away.  The metal wiper arm that rubs against the resistor was barely touching the resistor.  It was an easy fix, by gently bending the wiper arm a little closer to the resistor.  After reassembling the controller, it worked perfectly.  Scalextric race sets come with a 90 day warranty that covers the correct functioning of the product which would also have resolved the issue that I had with the one hand controller.

I was surprised that an oval track could bring so much fun.  It reminded me of watching a NASCAR race on TV as lap after lap you could slowly inch up on the car in front of you and also have a lot of side by side battles.   This set can also be expanded to a road course so you can replicate say Watkins Glen for those who also like to turn right.  Another thing worth mentioning is that Scalextric even got the clockwise direction right which is correct for a 1:1 oval stock car race.
 
Pros
  • Included 1986 Chevrolet Monte Carlo 1:32 slot cars are durable and look the part.
  • Hand controllers are comfortable and love the 4 speed settings.
  • Transformer is DC and has 1.2 amps of power.
  • Track is easy to assemble and disassemble.
  • Race set is compatible with Scalextric and other brands of analog 1:32 scale slot cars.

Cons
  • Controllers don't have brakes and one controller needed adjusted out of the box.
  • Track is made out of a soft plastic which needs to be used in a temperature controlled environment to resist warping.

Final Thoughts - I would say overall, this race set offers a very good out of box experience.  This Scalextric race set is a great option for those who plan on running only 1:32 scale slot cars on a hard surface in a temperature controlled environment and are somewhat limited in space.  Even better, you can upgrade this set at some point to either the ARC AIR power base which gives you wireless controllers, working brakes, lap counting and pit stops or the ARC PRO digital system which has all the features of the ARC AIR, but with the ability of racing up to 6 cars on the same track which can change lanes at special lane change tracks.

For those who want to run both 1:24 and 1:32 scale slot cars on a track that can also be in a garage or attic with wide temperature changes and/or folds up against the wall, then Carrera would be the better choice.

This race set is available for purchase right now at BRS Hobbies for $ 149.99 with FREE shipping within the United States.  Here is the link - Scalextric Stock Car Challenge

Friday, February 16, 2018

Redcat Caldera SC 10E Short Course Truck Review - Newest Version

The Redcat Racing Caldera SC 10E 4WD Brushless 1/10 RC Short Course Truck has been revised several times over the years so I felt it was time to review the newest version to see what it has to offer.  Also, this same Caldera 10E platform is available as a buggy and a monster truck with the main differences being the body, wheels and tires.
Upon opening the box, everything seems well packed and I was impressed with the paint job of the body which looks much better in person than the pictures I have seen on the internet.
I removed the truck from the box which is twist tied to the bottom cardboard tray.  Looking the truck over, I noticed an issue with the front wheels rubbing right behind the front wheel well area on both sides.  At first, it appeared the body hole locations were off.  Upon further inspection, the front body posts were angled forward somewhat.  It's hard to tell if the one body post is like this from the factory or if it has been tweaked slightly from being in the packaging.  The solution I came up with was to swap the two body mounts so the one with the angled body posts was on the rear.  This moved the body back about an 1/8 of an inch.  Additionally, using some curved scissors, I cut out the front wheel wells right on the mold line.  After doing this, the tires had plenty of clearance.

The next step was to install the antenna tube to the antenna tube holder.  I had to use a small flat blade screw driver to open up the clamp for the plastic antenna tube.  Then it was a matter of feeding the antenna wire into the tube, pushing it into the holder and tightening the nut.
I was impressed to find mounted in the Caldera chassis a Hobbywing 60 am brushless ESC combined with a 3421KV 4-pole brushless motor.  The ESC is easily programmed with a SET button that is held down with blinking lights to confirm each setting.  The ESC has the ability to program - 2 running modes, 4 maximum brake settings, 8 drag brake settings and 4 punch settings.  The included battery is a Hexfly 7.2V 3200 Mah LiPo battery with a deans plug.  A Redcat female T plug to 4.0 banana plug adapter is included so you can also run a Hexfly 7.4V LiPo that has a 4.0 banana plug with the Caldera SC 10E.  The AC charger puts out 900mA, so more of a slow charger that will take about 90 to 120 minutes to fully charge the battery. 

Moving onto the radio gear is a really nice 2.4GHZ transmitter that has a flip up cover for adjusting steering trim, throttle trim, steering dual rate and reverse for both channels.  The radio takes 4 AA batteries and has a really nice feel to it, very well balanced.  The servo is just a plastic gear 3KG Hexfly servo but so far has held up okay.
After charging the battery, I was checking the steering and noticed that the steering rack was contacting the front center drive cup when turning all the way to the right.  The solution was to readjust the steering links so they were both the same length and I also set the links so the front has about 1 degree of toe out.  You can also turn down the steering dual rates which will limit the maximum travel each direction.

The truck has plenty of adjustments which gives a lot of tuning options to help fine tune the handling.  You get 3 shock mounting options on the shock tower and on the arms both front and rear, as well as an adjustable camber and two inner upper link mounting positions front and rear.  While the Caldera SC 10E is primarily made for bashing, it's good to know that you can fine tune the handling to get the car dialed in on your chosen surface.  A tuning manual is also included which has setup sheets which could come in handy when trying different set ups.

Speaking of the tuning manual, it covers adjusting gear mesh.  I did find the gear mesh to be just a tad on the loose side.  Ideally, the spur gear should just have the slightest amount of wiggle as you check it in several different spots.  If the gear mesh is too tight, it will feel locked in some spots without any play between the gears which are 32 pitch (mod .8).

Everything on the truck is heavy duty including the shocks which are big bore size.  They are plastic but feel pretty good.  The 4wd drive train consists of front and rear gear diffs with a center spool.  Power is transmitted to all four wheels with CVA drive shafts.  I was pleasantly surprised to find the axles are 5mm compared to most 1/10 vehicles this size that come with 4mm axles.  The rod ends do feel a little tight but don't seem to affect the suspension movement or the steering.  Plus they will loosen up as they wear and I would rather have them a little tight than with too much slop.
 
 The wheels and tires are soft and seem to provide good traction on most surfaces but have a really tall profile.  Since the tires are so tall, I moved the lower shock position to the outer most hole on each lower suspension arm.  This lowers the truck slightly and also helps to reduce the side to side body roll.  Switching to a more traditional SCT tire will lower the truck and will also help the handling. 

After checking the truck over one more time, it was time to have some fun.  The truck has really good acceleration and top speed.  Very minimal cogging with the sensorless motor.  The brakes were too strong with the default esc brake setting, so I adjusted it from 75% to 50%.  Handling was really good but the truck was loose while turning off power.  You can get a sway bar as an option which I will try in the front to take out some of the off power steering.  The truck really rips around and seems very composed over the surfaces that I ran it on.

Some tips:  use some blue thread-lock on any of the screws that go into metal and be careful not too over tighten any of the screws.  You only need to tighten them until they feel tight and don't need to tighten any further.  The electronics are listed as waterproof but I would take care when driving in wet conditions to only drive over really shallow puddles since most electronics aren't made to be fully submerged.

Recommended upgrades would be
  1. The Hexfly 15KG metal gear servo which is much more durable than the stock plastic servo.
  2. A faster charger such as the Hexfly HX-403 LiPo charger which is 3 times faster than the stock charger.  
  3. The Redcat BS903-111 metal steering knuckles are a good option to beef up the front end even more.  
  4. Something else worth considering would be to get the sway bar which you can try in the front or back or both to help get the handling to your liking.  To make one sway bar unit you will need one Redcat BS905-009 anti roll bar and two Redcat BS903-029 anti roll bar links.
Overall, I am quite happy with the Caldera SC 10E it really offers a great value considering what you get.  It has more tuning options and a longer wheelbase than the Redcat Blackout SC.  The longer wheelbase helps keep the front end down under hard acceleration.  Really the only downsides are the plastic gear servo which is easy to upgrade for around $18 and the tall tires which may be good enough for bashing but generally I find a lower profile tire will provide better overall handling.

My out of the box ratings for the Redcat Caldera SC 10E are
  • Speed  =  4 out of 5
  • Handling  =  3.5 out of 5
  • Durability  =  4 out of 5
  • Electronics  =  4 out of 5
  • Upgrade Part Options = 3.5 out of 5
TOTAL = 19 out of 25

This Redcat Caldera SC 10E Short Course Truck is available for purchase right now at BRS Hobbies for $ 249.99 with FREE shipping within the United States.  Here is the link - Redcat Caldera SC 10E Brushless 4WD 1/10 RC Short Course Truck


Monday, January 29, 2018

Redcat Radio Control 1/10 Vehicles


Established in 2005, Redcat Racing has become the premier name for Fast- Affordable - Fun ready to run, electric powered remote controlled surface vehicles. All Redcat Racing vehicles come fully assembled and ready to run right out of the box making it simple for anyone to get started in the R/C hobby. Redcat Racing has a complete line of parts and accessories as well as a wide selection of vehicles, ensuring that there is a Fast-Affordable-Fun vehicle for everyone.

To see all the Redcat Racing RC vehicles available at BRS Hobbies, please click on this linkRedcat RC  

Saturday, January 20, 2018

NEW AFX Mega-G+ Mustang Mach 1 & Camaro SS 350 HO Slot Cars

The new AFX Mega-G+ Mustang Mach 1 & Camaro SS 350 HO slot car comes with all new 5 spoke wheels and is expected to ship out to customers mid to late February of 2018.  For more information - AFX Mega-G+ HO Slot Cars

Saturday, November 18, 2017

Carrera GO Plus Night Chase Race Set Review

Carrera GO 1/43 slot car products have been around for quite some time and have been providing a lot of fun to families and friends.  Carrera has recently launched Carrera GO Plus in the USA which adds a lot of new features including a 1 player mode in which you can race against a ghost car (autonomous car) as an opponent and the ability to display race information on a phone or tablet.  This Carrera GO Plus Night Chase 1/43 race set review will walk you thru all that Carrera GO Plus has to offer.

To get started, here is a picture of the front of the race box.
Then to open up the race set you need to open up one of the side flaps, then slide out the cardboard tray that holds the contents out of the race set box.  It's important to pull the handle out as you do this, otherwise the cardboard tray will hang up on the ends of the handle that are inside the race set box. 
The cardboard tray does a nice job of holding the contents of the race set and each type of track piece is nicely shrink wrapped together.  I found some care needs to be taken when removing the shrink wrap from around the track.  I recommend cutting the shrink wrap off rather than just trying to puncture and pull it off by hand.  This will help to protect the track tabs that stick out on each end. 
The assembled track layout size is 9.02 x 4.17 feet so be sure you find an area large enough for the layout.  You could also alter the layout slightly to change the footprint size as needed. I chose to set up the track in our basement on a carpeted floor.  Before doing so, I recommend vacuuming the carpet and then setting down a tarp or heavy duty plastic table cloth.  This will serve as a barrier between the carpet fuzz and the track and cars.  Carper fuzz can get in the car's wheels and axles over time which can eventually slow the cars down and diminish their performance.

Another cool option is that the directions show how to set up the track with or without the loop.  The loop can be challenging for some, so if it is your first time racing on a Carrera GO track, then you may consider setting up the layout without the loop.  You can always add it later on.  The layout assembly directions are a diagram with each part lettered.  The underside of the track pieces have a letter which really helps to identify which track pieces go where. 
Assembling the track is one area that can be a bit tedious, especially the first time since some of the track pieces can be a little challenging to get together.  You basically want to push the track pieces together evenly.  I found some track pieces were really easy to put together and some were a little more stubborn.  For the track pieces that you are having a tougher time with it, it really helps to push the pieces together evenly until you get a 1/8" gap or less.  Then push one side together and then the other.  A few pieces didn't seem like they would go together so I moved them some where else in the layout and all went together just fine. The bank curves also seemed a little more difficult to assemble then the flat track pieces.  The main thing is to set up the track (especially the first time) with an adult or with adult supervision while taking a little extra care not to over stress the track connecting tabs.

This set also comes with some new easy to attach red track supports. They are easy to install once you find the place that they attach to on the underside of the track.  I tried putting the supports according to the instructions but did find that some of them weren't touching the floor so I moved them around until I found a place where each support touched the floor.

The total assembly time was about 45 minutes, I am sure subsequent assembly times will be quicker since you will have a better idea where all the track pieces go and the track pieces will be easier to put together.  The track layout itself is a fast flowing track with plenty of banked curves, R2 curves, intersection and a narrow straight.  The layout only has 4 R1 curves which are the smallest radius curves but banked for higher speeds.  This ultimately means that the cars can be driven faster with fewer de-slots than those Carrera GO layouts that use the R1 flat curves. 
This Carrera GO Plus Night Chase race set come with two Lamborghini Huracan LP 610-4 1/43 slot cars, the Miami Police with flashing roof lights and the street Avio with ground effect lighting.  The cars measure approximately 4.125 inches long by 1.250 inches wide.  Both cars are super cool and very well detailed.  Before running the cars, it's important to fan out the braids and position them as shown in the instructions.
The Carrera GO Plus connection track really adds to the racing experience and can be used with or without the App.  You get three race modes - 20 or 30 lap race, chase which gives one car a head start and the other car has to catch him and training with no lap restriction.  Additionally, you have the option of programming one of the cars or any other Carrera GO 1/43 slot car as a ghost car.  This is a great option for solo racing with the track.  When racing without the app, a fan fare sound is played and the winning car can continue driving while the losing car is stopped on the track.
One player mode is set up by switching to the ghost using the selector switch on the Carrera GO Plus connection section.  Then you position the car to be programmed in the red lane about one standard straight or 12 inches behind the start/finish line.  Press the Plus button on the power base and drive two complete laps stopping before the start/finish line (where you started).  You will then get a sound signal after a few seconds letting you know that the programming is complete.  Unplug the controller that you used to program the ghost car, select a race mode and then start the race.  The ghost car will actually speed up and slow down just as it was programmed around the track.  If the ghost car comes off the track, then you can restart it by pushing it at a normal running speed across the start/finish line.  In my opinion, this is a great feature and is great fun when using the track by yourself.

Now onto the Carrera GO Plus app which uses a Bluetooth connection to link your IOS and Android phone or tablet to the Carrera GO Plus connection track.  The main benefit is that you get the lap count and lap times for each car.  It also adds games that are sent randomly to one of the drivers while the race is in progress.  The driver in question is stopped on the track and the game either must be completed successfully or after 20 seconds will resume racing on the track.  This may be fun for some but I found it to disrupt the racing action too much and the games seemed to be more of a chore after awhile that you need to do just to rejoin the race.

The good news is I found a workaround for those who don't want to play the games.  In one player mode, the games are deactivated since the ghost car wouldn't be able to do them.  In two player mode, you only need to have the red lane controller unplugged when you first press the Plus button to initiate the start of the race countdown.  Once the countdown starts, you can then plug in the controller and race with two drivers without the random games coming up during the race.
This set has provided many hours of fun both racing solo and with other drivers.  The controllers also have a turbo button which gives you a higher top speed that when perfected helps getting a little extra speed and into the loop. The intersection adds a lot of excitement to the racing, since if you don't time it right the cars run into each other and will most likely come off the track.  The cars run really smooth, are plenty durable and the lights are neat for racing with low light in the room.  I find the skill level of the race set to be just right since you need to drive the cars somewhat around the track but not so much that it gets frustrating.  We have had kids and adults of different skill levels use the track and all were able to get around the track just fine (some faster than others).  The only issue is that one of the cars started making a squeaking sound.  I put a drop of plastic compatible oil at the interface of the chassis and the axles (4 spots) and the sound disappearedThen the car ran even smoother due to the oil reducing the friction of the axles.

Is Carrera GO Plus worth it?  I say yes.  It adds the ability to run properly scored races, gives the option to run against a ghost car and shows lap times with the app which is good for fine tuning the cars.  The Carrera GO Plus connection track will also be available separately in the near future.  If you have one of the newest Carrera GO race sets that come with red controller plugs than you only need the Carrera GO Plus connection track to convert an existing Carrera GO track to GO Plus.  If you have a Carrera GO track with black controller plugs, then you will also need two Carrera 20061663 GO Plus Controllers.

This Carrera GO Plus Night Chase 1/43 race set is available for purchase right now at BRS Hobbies for $ 135.99 with FREE shipping within the United States.  Here is the link - Carrera GO Plus Night Chase Race Set

Sunday, August 20, 2017

Estes Monarch Model Rocket Build, Part 3

By Mike Swanson

Between work and family activities, It's been a few weeks since I was able to work on the Monarch and update this blog.  From the last blog entry, it was pretty close to being ready to paint and I finally finished it up this weekend !  I started by brushing on 2 coats of sanding sealer on the fins and sanding with 320 grit sandpaper to fill in the balsa grain and make the fins nice and smooth.  I then wiped the entire rocket down with a slightly damp paper towel to remove any residual dust from sanding.  

I like to start painting my rockets by using a gray filler primer to help fill in the body tube grooves as well as any remaining grain in the fins.  Lately I've been using Rustoleum  Automotive Filler Primer for this task.  I  applied a few light coats, let the primer dry, sanded the entire rocket with 400 grit initially, and finished with 600 grit sandpaper.  I then wiped the rocket with a damp paper towel as I always do after sanding and before painting.
Next I applied a few coats of Rustoleum Painter's Touch 2X White Primer until I got a nice, even white base coat on the rocket.  This time, I sanded lightly with 800 grit to get a nice smooth finish and again wiped the rocket down to remove any dust/debris from sanding. 
Finally it was time to apply the gloss white top coat.  Again, I used Rustoleum Painter's Touch 2X for the job and applied 3 light coats, letting the paint dry about a minute between coats before applying a heavier final coat.  At this point I let the rocket dry for a few days before masking off the white areas in preparation for applying the green paint.  To get nice, crisp stripes between colors, I use Tamiya masking tape along the edges and 3M blue masking tape and brown paper to cover the rest of the rocket.  One way to create nice straight bands around a body tube is to use a rolled up piece of paper as a guide:

With the rocket masked off per the instructions, I applied 3 light and a final heavier green coat similar to the white.  After letting the paint dry and removing the masking tape, it looked like this:
The instructions say to mask the rocket again and apply silver paint for the final accent stripes.  Since I didn't feel like buying a can of silver paint just for a few stripes (plus I was getting a little lazy), I used some silver striping tape I had on hand.  It still came out very nice and after applying the "Monarch" decal, I sprayed the entire rocket with a few coats of gloss clearcoat to protect the rocket:
The last step was to build the parachute per the instructions and attach it and the shock cord to the nosecone.  I was really happy with the way the rocket turned out.  It's a nice looking, good size Skill Level 1 rocket that should fly very well.  I'll be sure to update the blog once I get a chance to put it in the air !